The MS Word application offers a powerful Compare documents tool for identifying the differences between two different DOCX files. This tool is typically used to compare two versions of the same DOCX document as it progresses through a collaborative editing process.
In contract negotiations, for example, MS Word documents are often passed back and forth between teams with competing interests. Changes (e.g., “Legal Blacklines”) are implemented by both sides during that process. Comparing the original version of a contract with the final version helps visualize and quantify the extent to which a document evolved from its original version during the negotiation process.
Comparing Word Documents with the Cloudmersive Convert API
The Cloudmersive Convert API library offers a Compare Two Word DOCX API for automating comparisons between MS Word documents. This API takes advantage of the MS Word comparison tool and greatly abstracts developer interactions with it.
Using the Compare Two Word DOCX API, developers can supply two DOCX file paths as arguments to return a single DOCX file with content highlighting the differences between the original two. The order of input file arguments matters in this case; the second document will be compared against the first. This means the resulting document will highlight what the second document changed from the first.
In this article, we’ll demonstrate the end-to-end process of implementing the Compare Two Word DOCX API using Python code examples. We’ll create a test case with two example “Contract” documents, and we’ll implement our example code in Google Colab to streamline the process. We’ll make copy & paste code examples available in this article to help developers get up and running in minutes.
Locating Compare Two Word DOCX API Python Code Examples
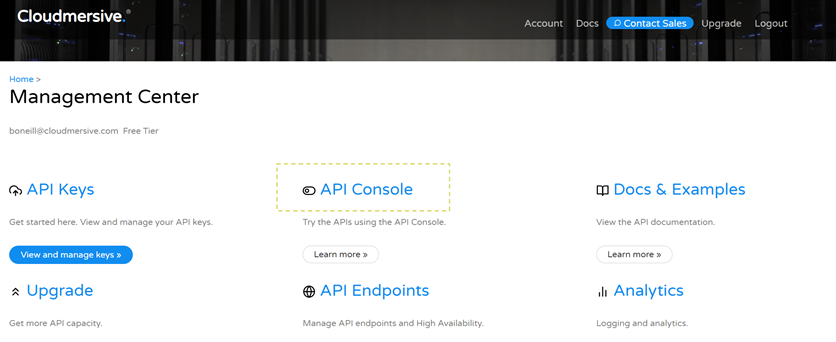
We’ll find the Python code examples we need to implement the Compare Two Word DOCX API on the Cloudmersive API Console. Starting from our Cloudmersive Management Portal home page, we’ll click on the API Console link and select the Convert API option from the following page.
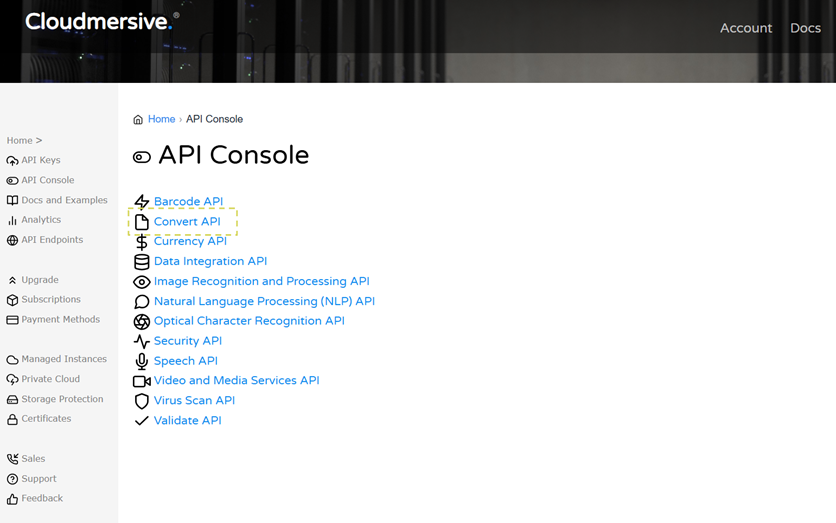
On the Convert API console page, we’ll find the CompareDocument path right at the top. We’ll notice tabs for two comparison APIs under this path – one for contemporary DOCX files, and one for legacy DOC files. We’ll be demonstrating the DOCX version in this article.
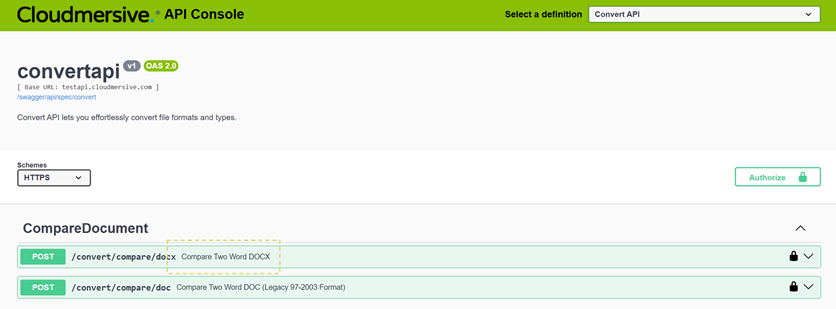
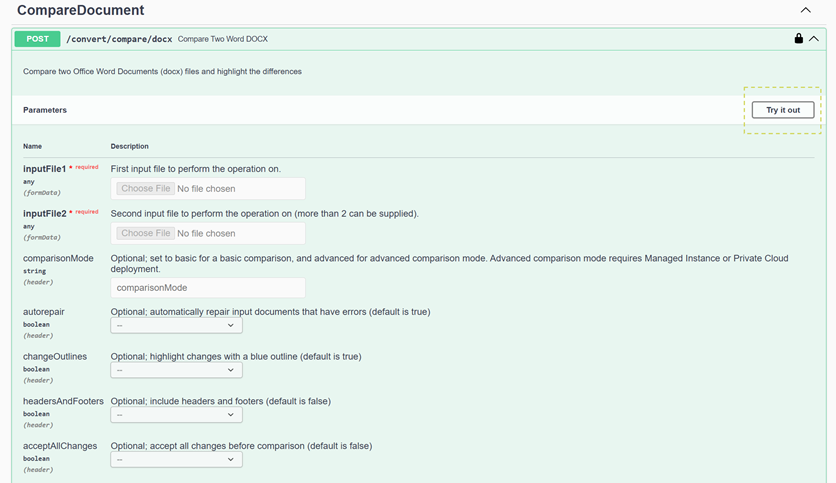
After we select the Compare Two Word DOCX tab, we’ll have the option to make a test call without writing any code. If we want to go this route before implementing code, we can simply click Try it out and fill in parameters from there.
Towards the bottom of the Compare Two Word DOCX API tab, we’ll find the option to select Python code examples. When we select this option, we’ll bring up pre-formatted code with prepared imports and code snippets for handling API key authorization, instantiation, and response object generation.
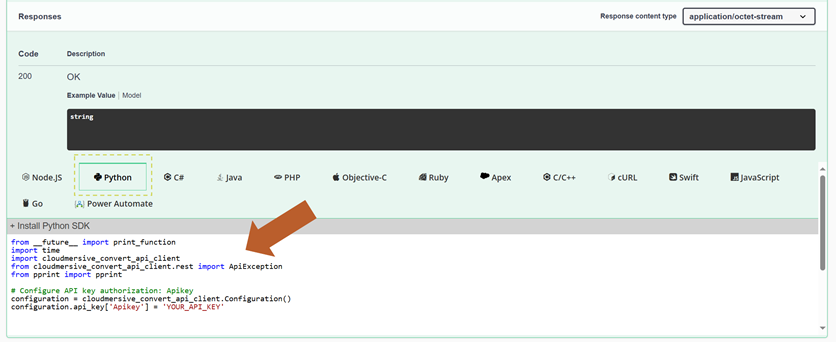

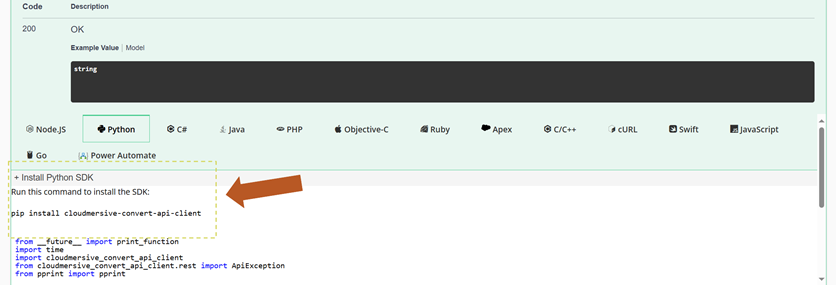
At the top of the code window, selecting the Install Python SDK dropdown will bring up with pip install command we need to install Convert API resources in our environment. We’ll copy this command – along with the rest of our code – and paste that in our environment to begin structuring our request.
We can also copy this code directly from the below code block:
pip install cloudmersive-convert-api-client


from __future__ import print_function
import time
import cloudmersive_convert_api_client
from cloudmersive_convert_api_client.rest import ApiException
from pprint import pprint

# Configure API key authorization: Apikey
configuration = cloudmersive_convert_api_client.Configuration()
configuration.api_key['Apikey'] = 'YOUR_API_KEY'


# create an instance of the API class
api_instance = cloudmersive_convert_api_client.CompareDocumentApi(cloudmersive_convert_api_client.ApiClient(configuration))
input_file1 = '/path/to/inputfile' # file | First input file to perform the operation on.
input_file2 = '/path/to/inputfile' # file | Second input file to perform the operation on (more than 2 can be supplied).

try:
    # Compare Two Word DOCX
    api_response = api_instance.compare_document_docx(input_file1, input_file2)
    pprint(api_response)
except ApiException as e:
    print("Exception when calling CompareDocumentApi->compare_document_docx: %s\n" % e)
Structuring our Request
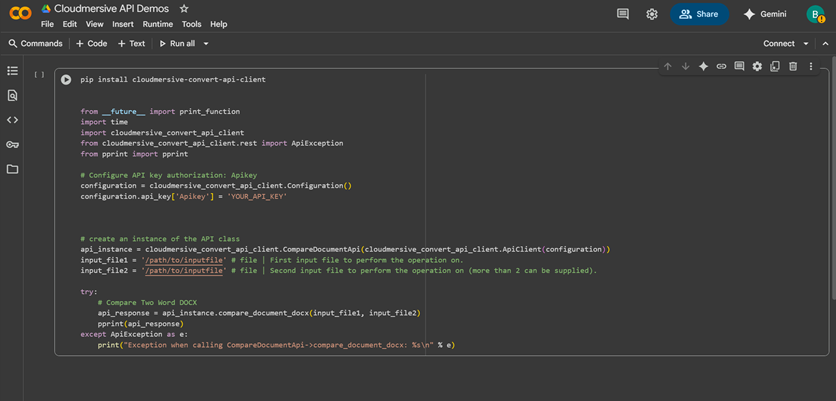
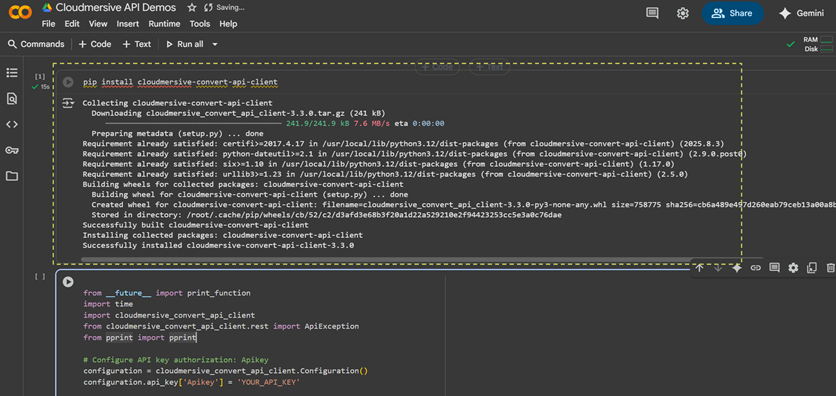
In our environment, we’ll first separate the pip install command and run it in our terminal (or in its own code cell if we’re using Colab / Jupyter Notebooks).
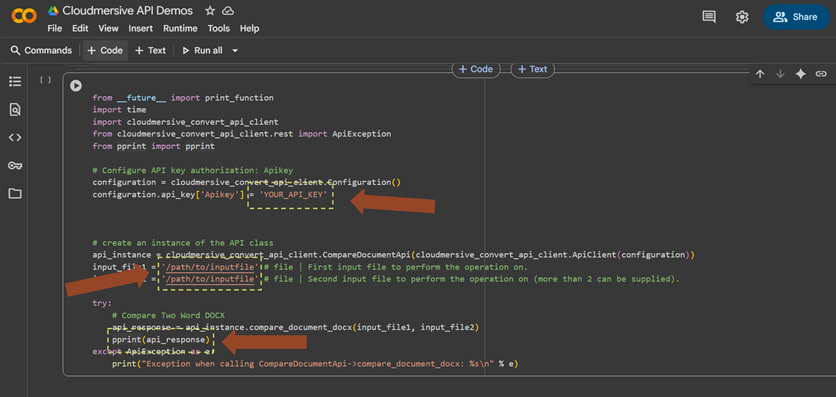
Once installation is complete, we’ll make three quick changes to our code and run it. We’ll first replace the ’YOUR_API_KEY_HERE’ placeholder text with our own API key string, then replace the ’/path/to/inputfile’ placeholders with the DOCX files we’re comparing, and finally replace the pprint(api_response) line with some code that generates our comparison document on the local path.
Setting our API key
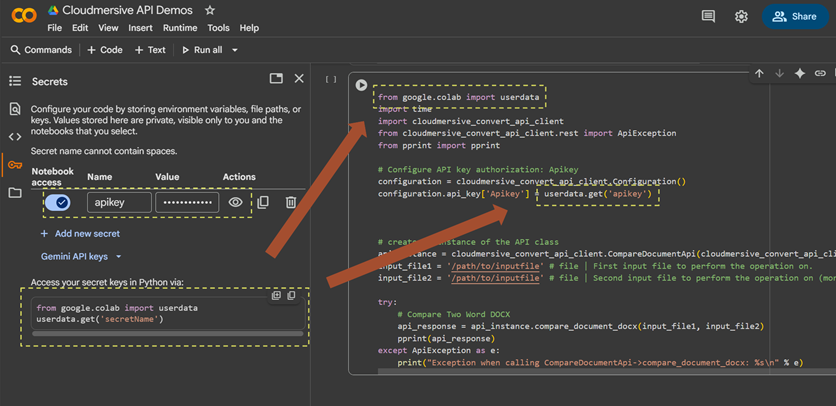
To set our API key string, we’ll ideally want to replace the ’YOUR_API_KEY_HERE’ placeholder text with a method that hides our key from view. Since we’re demonstrating in Colab, we’ll use the Secrets tab to store our API key and set authorization at runtime with the userdata.get() method.
Configuring our File Inputs
To configure our input_file1 and input_file2 variables, we’ll upload the documents we’re comparing on our local path and replace the placeholder paths in our code with the paths to those documents. As a reminder, it’s important that we order these inputs correctly; the comparison output will compare the second document against the first.
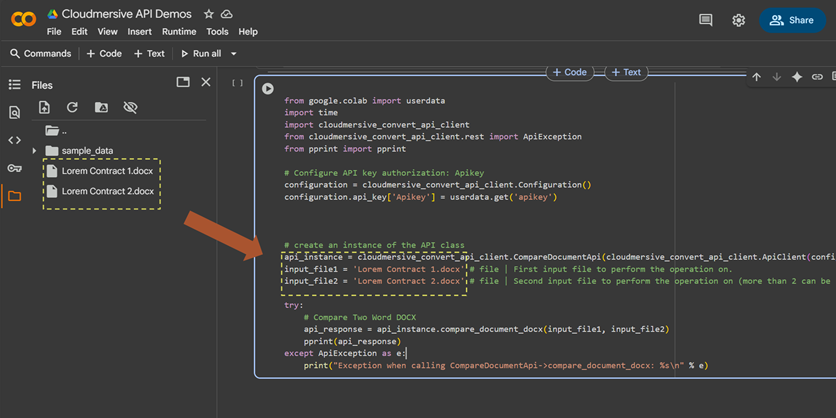
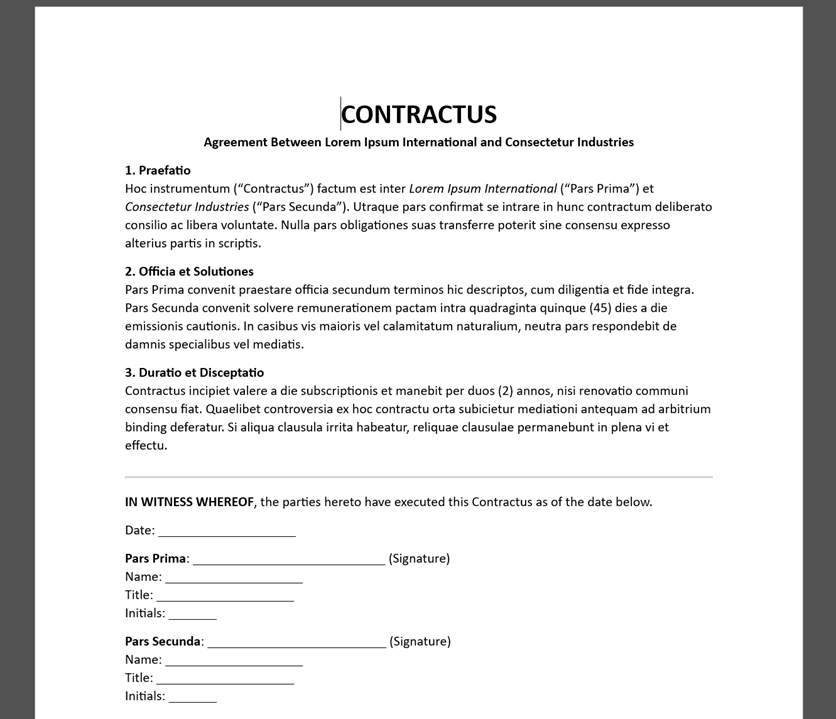
In this example workflow, the documents we’re comparing – “Lorem Contract 1” and “Lorem Contract 2” – are two versions of an example contract with Lorem Ipsum text.
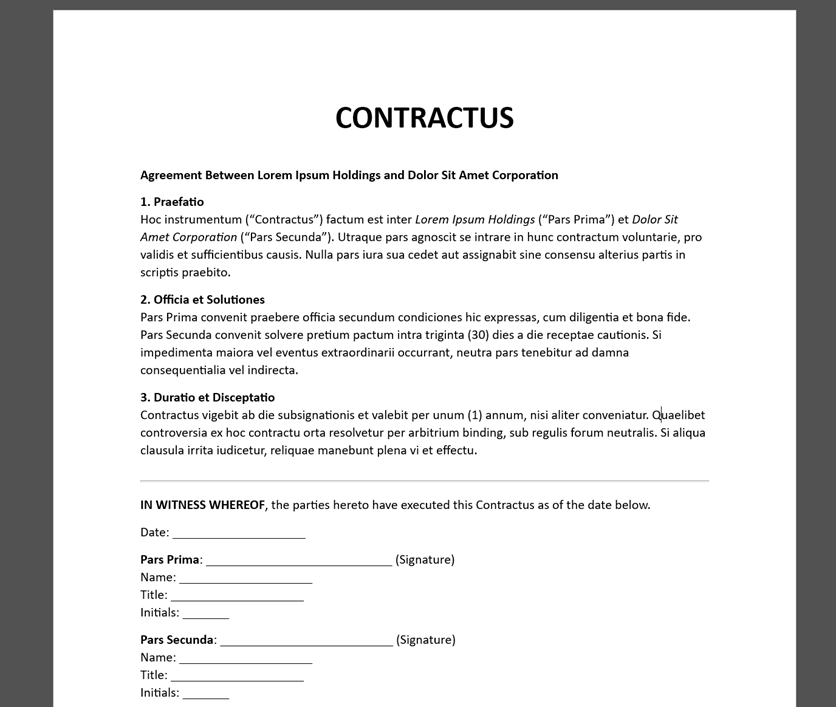
“Lorem Contract 1”:
“Lorem Contract 2”:
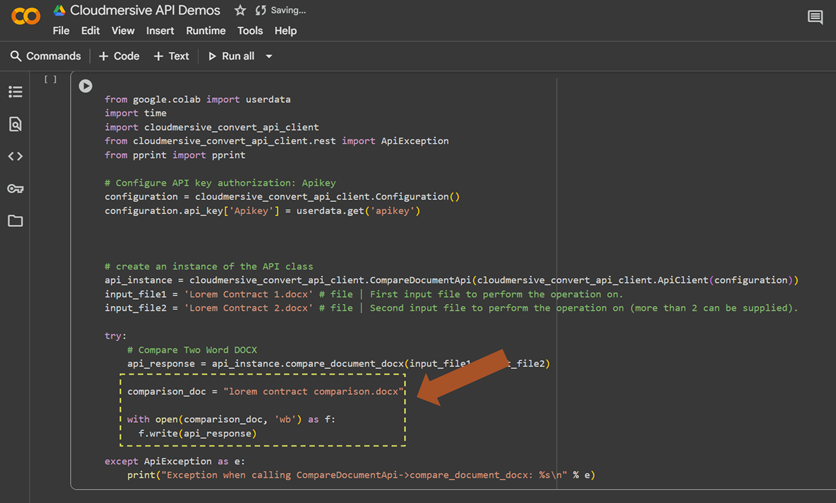
Generating the Comparison Output
Finally, to generate our comparison document, we’ll remove the pprint(api_response) line in our code and replace it with a with open() statement that writes file bytes from the api_response string to a new file on the local path. This API returns file bytes directly; we don’t have to navigate the response object or decode a base64 string.
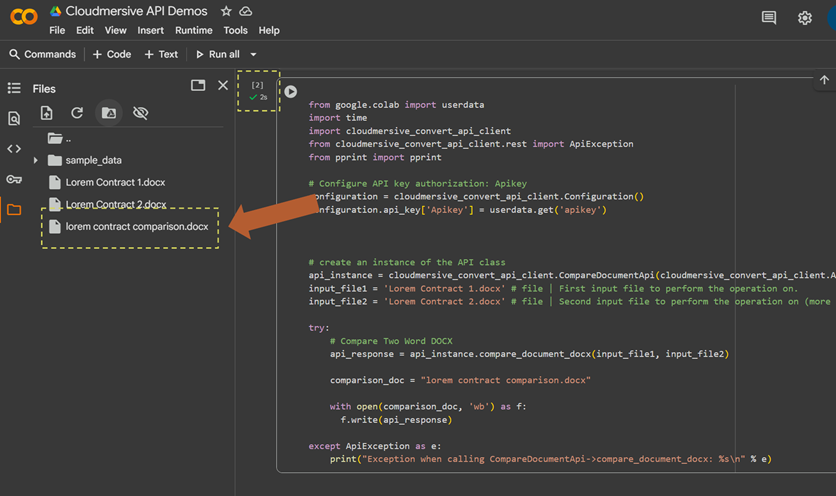
Running our test code
When we run our code, we’ll generate the comparison document on our local path.
When we open this document, we’ll find all the differences between “Lorem Contract 2” and “Lorem Contract 1” highlighted and underlined. This provides a succinct summary of changes between the two files.
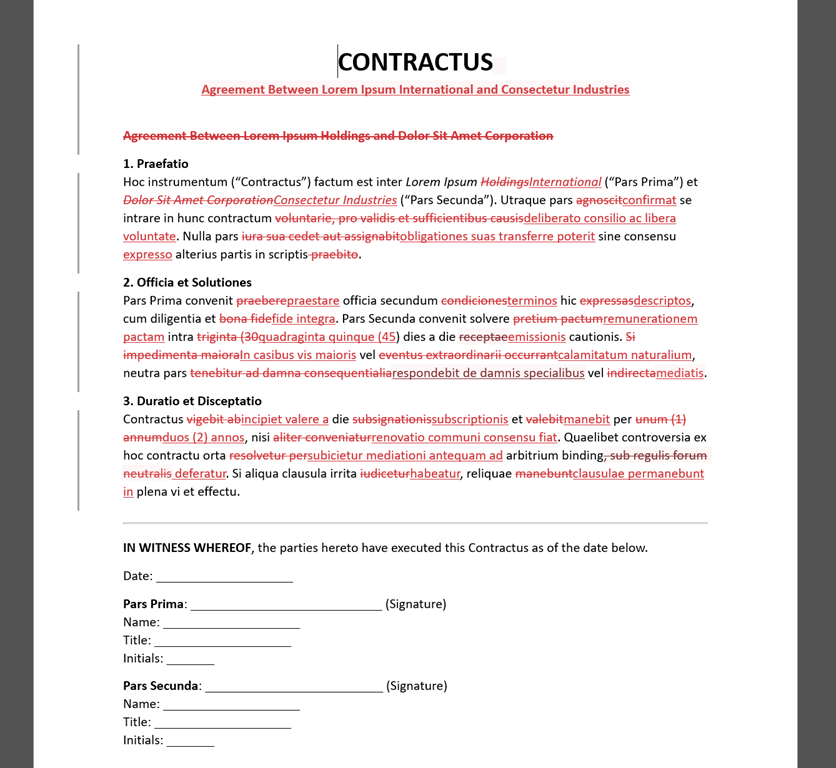
And that’s all there is to it – we’ve now built a simple, heavily abstracted DOCX comparison workflow using minimal code.
Conclusion
In this article, we learned how to easily automate comparisons between two DOCX documents in Python using the Compare Two Word DOCX API. We set up our example request by making simple changes to complementary, pre-formatted code examples.
If you have any questions after following along with this walkthrough, please feel free to contact a member of our team.


 Technical Articles
 Virus Scan APIs
 Content Disarm and Reconstruction APIs
 Spam Detection APIs
 Document Conversion & Processing APIs
 Document AI APIs
 Natural Language Processing (NLP) APIs
 Optical Character Recognition (OCR) APIs
 Image and Face Recognition and Processing APIs